|
|
Export to PDF3D Exporting 3D window content to an interactive 3D file |
Export to PDF3D

To access this dialog:
-
In the 3D window, activate the View ribbon and select Save To| PDF3D
-
Activate the Map ribbon and select Plot | 3D PDF
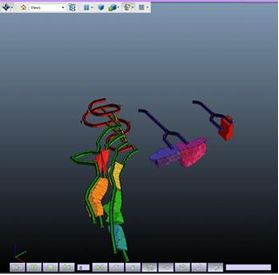
The Export to PDF3D dialog is used to export loaded data in the 3D window to one of the following interactive 3D file formats, using PDF3D technology:
- 3D PDF (*.pdf)
- U3D (Universal 3D) (*.u3d)
- PRC (Product Representation Compressed) (*.prc).
Interactive 3D formats provide the following advantages:
-
Improvements to the distribution, collaboration and sharing of Interactive spatial data, using a standard, high quality, compressible format. There is no need for specialized 3D visualization software - commonly-available PDF viewers can be used instead.
-
They can be embedded in Microsoft PowerPoint presentations, without the need for plug-ins, and included in technical reports.
You can export any visual data as a 3D PDF document: wireframes, strings, points, planes, block models and DirectX® objects. You can also export 3D objects that can be embedded within a PDF document using a suitable PDF writer application.
Provided that the exported data format
is supported for the file type that is requested, the formatting options
you select for your data will be honored: for example, wireframe data
colored with highlighted edges will be shown as such in the resulting
PDF3D document, and if a block model is shown as a "quick intersection",
that is how it will appear in the output file.
|
|
If multiple views are shown in the data display (that is, you have split the window horizontally and/or vertically), only the active window is exported. You can activate a view by left-clicking inside it, which displays a yellow highlight around the edge. |
Field Details:
Filename : type in or browse to define the folder, file name and file type (.ped, .u3d, .prc). Clicking Browse will open the Save As dialog.
Options: select the export options listed below, if required. These are available once a valid Filename has been defined.
Animation (only available in PDF format): select this check-box to include any sequencing/animation parameters that have been defined for the objects in the 3D window.
|
|
This option is only enabled for the *.pdf file type, and only if animation has been defined in the project. The animation of exported PDF3D files is not possible for U3D or PRC file types. |
Export hidden overlays: if selected, then overlays that are toggled off in the Sheets control bar are exported to PDF 3D. If not selected, then these overlays are not exported.
This option is disabled if animation is selected, since the animation of PDF3D objects is only possible for objects that are visible in the 3D window. |
Export labels: if labels are displayed in your scene, you can export them if this option is enabled. Labels can significantly increase the time it takes to generate your output, so you can disable this check box if you wish to avoid exporting labels.
Compress output: by default, wireframe data within your scene will be compressed as part of the output to PDF3D, which can result in a significant reduction in file size (up to 15x compared to non-compressed output). Compression also applies to rendered block models too, because they are represented in the PDF3D environment as wireframes.
String, point, plane and drillholes data is unaffected by this setting.
This option is disabled if animation is selected, since the animation of PDF3D objects is only possible for objects that are visible in the 3D window. |
| File Format Characteristics and Uses
|
For more information on interactively viewing exported data, see the help file of your default PDF viewer - for example, Adobe Reader 8®, |

Exporting 3D Data to a 3D PDF File
Open the PDF3D dialog.
In the Export to PDF3D dialog, Filename box, click Browse.
In the Save As dialog, define the folder, file name and file type (.pdf, .u3d, .prc) parameters, and click Save.
In the Export to PDF3D dialog, Options group, select the required parameters, and click OK.
Browse to the exported file, and view it in the PDF viewer.
In addition to the 3D data objects - strings, wireframes etc. - 3D Viewpoints (listed in the Sheets control bar, Objects folder) can also be exported. In order for viewpoint names to be exported, they must already be displayed in the 3D window. This is done by selecting the Show Name in World option in the Object Properties dialog for each viewpoint. |
Exporting Animated 3D Data to a 3D PDF File
Load and format the required data in the 3D window.
In the Sheets control bar, 3D folder, right-click the item to be animated and select Properties.

Alternatively, double-click the visible data in the 3D window.
In the Properties dialog, General tab, select the sequence column from the Sequence Column drop-down list - for example, SEQUENCE, PERIOD, COLOUR etc..
Set the Anim. Step to 1 or higher (the default value is set to zero).

The Anim. RateandAnim. Step fields in the Properties dialog, General tab can be used to configure the exported animation.
Ensure that all animated data is in view - by clicking Zoom all, for example - and that the FINAL animation frame is displayed.
With the 3D window displayed, activate the Data ribbon and select Export | PDF3D
In the Save As dialog, Filename field, click Browse.
In the Export to PDF3D dialog, select the required folder and file type, define a name for the file, and click Save.
In the Export to PDF3D dialog, Options group, select Animation (only available in PDF format), and click OK.
Browse to the exported file, and view it in the PDF viewer.
When an animated/sequenced object has been included in the exported data, the 3D PDF file opens in Adobe Reader®, with additional animation controls at the bottom of the screen:
|

